Fair warning: once you make these brownies, regular brownies will feel like a compromise. That boxed mix in your pantry? You'll never look at it the same way again.
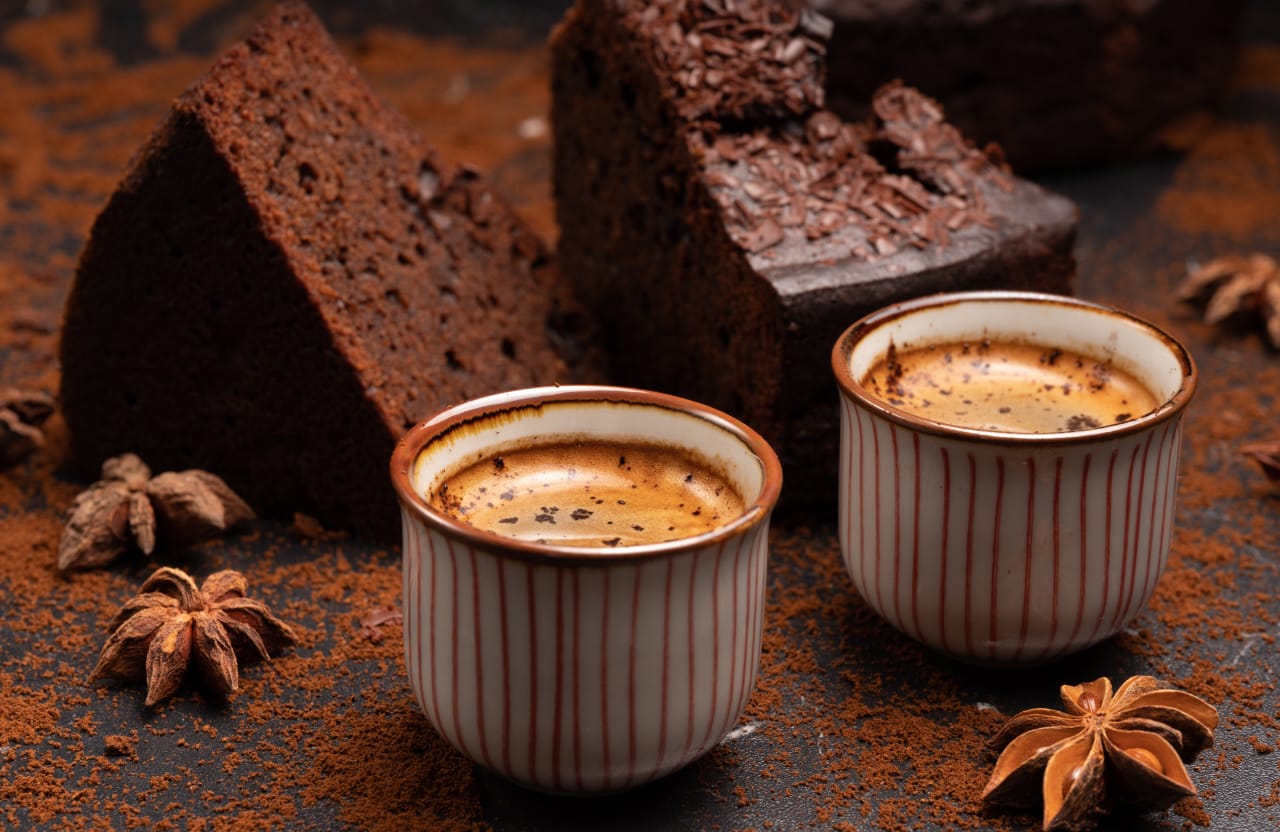
These aren't brownies with a hint of coffee flavor. These are deeply, unapologetically espresso-forward—fudgy, intense, and rich enough to make your eyes close on the first bite. The kind of brownie that pairs with a glass of cold milk or a shot of actual espresso if you're feeling committed.
We've been making this recipe at the roastery for years, tweaking it until every element earned its place. Now we're sharing it, because some things are too good to keep secret.
Why Espresso Makes Brownies Better
Here's something most people don't realize: coffee doesn't just add coffee flavor to chocolate desserts. It amplifies chocolate itself.
The roasted, bitter compounds in espresso enhance our perception of chocolate's depth and complexity. It's the same reason high-end chocolate bars often include a pinch of coffee—not enough to taste, but enough to make the chocolate taste more like chocolate.
In these brownies, we push that principle further. You'll taste the espresso, and you'll taste richer, more intense chocolate because of it. They work together, each making the other better.
"The first time I made these, I thought I'd finally figured out what brownies were supposed to taste like all along."
The Ingredients
This recipe uses weight measurements for precision. Baking is chemistry—eyeballing flour is how you end up with dry, cakey brownies instead of fudgy ones.
For the Brownies
| Ingredient | Weight | Volume (approximate) |
|---|---|---|
| Butter, unsalted | 170g | ¾ cup (1½ sticks) |
| Dark chocolate (70%) | 170g | 6 oz |
| Granulated sugar | 200g | 1 cup |
| Brown sugar | 100g | ½ cup packed |
| Eggs, large | 3 | 3 |
| Vanilla extract | 1 tsp | 1 tsp |
| Espresso, freshly brewed | 60ml | ¼ cup |
| All-purpose flour | 85g | ⅔ cup |
| Cocoa powder | 30g | ¼ cup |
| Fine sea salt | ½ tsp | ½ tsp |
| Espresso powder | 2 tbsp | 2 tbsp |
Optional Add-Ins
- Chocolate chips: 100g of dark or semi-sweet, folded into the batter
- Flaky sea salt: Sprinkled on top before baking
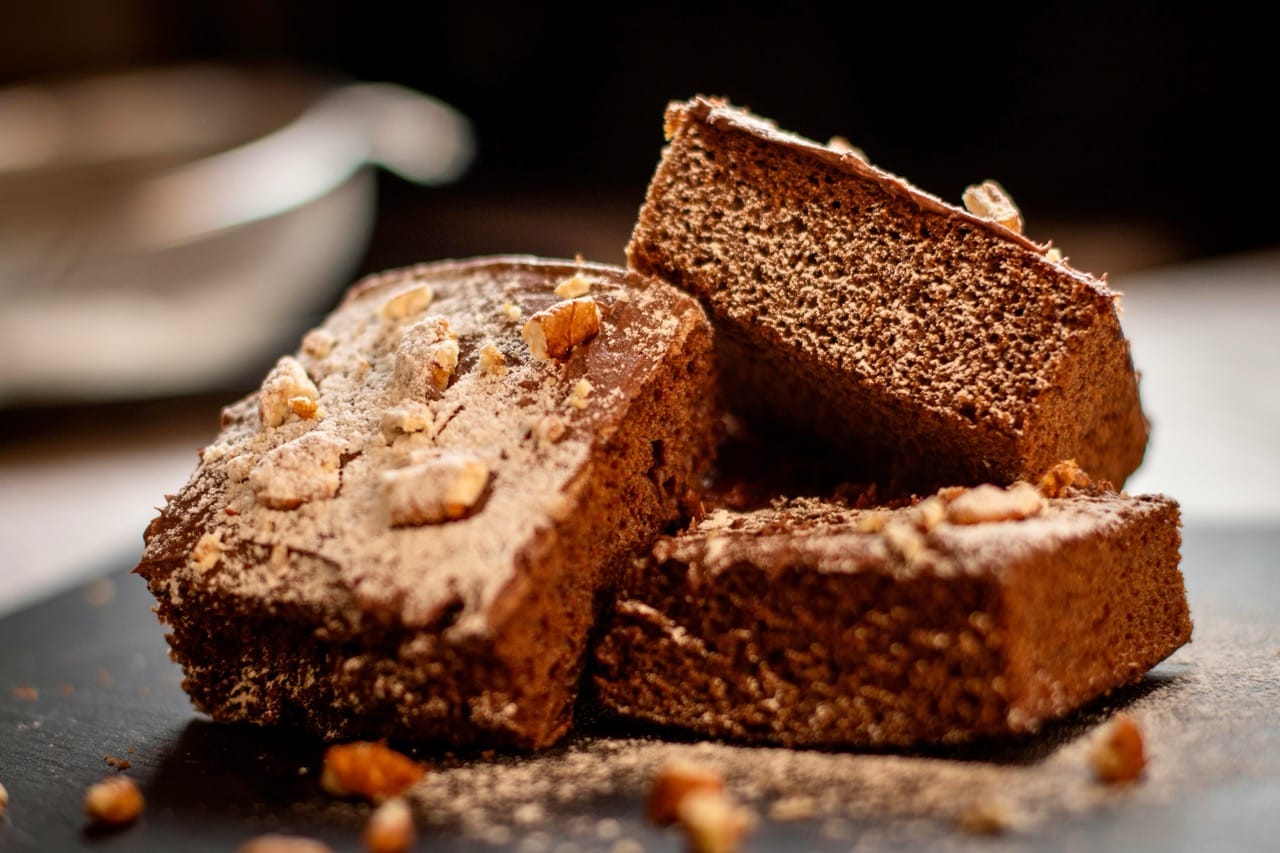
- Chopped walnuts: 80g for texture contrast
Equipment You'll Need
- 9x9 inch baking pan
- Parchment paper
- Medium saucepan
- Mixing bowls
- Whisk
- Spatula
- Kitchen scale (highly recommended)
The Method
Step 1: Prep Your Pan
Preheat your oven to 350°F (175°C). Line a 9x9 inch pan with parchment paper, leaving overhang on two sides for easy removal. Lightly butter any exposed edges.
Step 2: Melt Butter and Chocolate
Cut the butter into chunks and place in a medium saucepan with the chopped dark chocolate. Melt over low heat, stirring frequently. The goal is gentle melting, not cooking—you don't want the chocolate to seize or the butter to brown.
Once smooth, remove from heat and let cool for five minutes.
Step 3: Brew Your Espresso
Pull a double shot of espresso, or brew 60ml of very strong coffee. Let it cool slightly while you prep the other ingredients. If you don't have an espresso machine, a Moka pot or AeroPress works beautifully here.
Step 4: Mix the Sugars and Eggs
In a large bowl, whisk together both sugars and the eggs until combined and slightly lightened—about one minute of vigorous whisking. You're not looking for ribbon stage; just a cohesive mixture.
Add the vanilla extract and the brewed espresso. Whisk to combine.
Step 5: Combine Wet Ingredients
Pour the slightly cooled chocolate-butter mixture into the sugar-egg mixture. Whisk until smooth and glossy. The batter should look like shiny chocolate sauce.
Step 6: Add Dry Ingredients
In a separate bowl, whisk together the flour, cocoa powder, espresso powder, and salt. Sift if your cocoa is lumpy.
Add the dry ingredients to the wet ingredients in two additions, folding gently with a spatula. Stop mixing as soon as you don't see streaks of flour. Over-mixing develops gluten, which makes brownies tough and cakey.
If you're adding chocolate chips or nuts, fold them in now.
Step 7: Bake
Pour the batter into your prepared pan and spread evenly. If using flaky salt on top, sprinkle it now.
Bake for 25–30 minutes. The brownies are done when the top looks set and a toothpick inserted in the center comes out with moist crumbs—not wet batter, but not clean either. Fudgy brownies require pulling them before they're fully set in the middle.
Step 8: Cool Completely
This is the hardest part. Let the brownies cool in the pan for at least two hours, preferably three. They continue cooking from residual heat, and cutting too early results in a gooey mess.
For extra-clean slices, refrigerate for an hour before cutting.


Tips for Perfect Results
Use good chocolate. This isn't the place for chocolate chips or baking chocolate. Use a bar you'd happily eat on its own. The chocolate flavor is too prominent to hide behind sugar.
Don't skip the espresso powder. The brewed espresso adds moisture and flavor; the powder intensifies the coffee notes without adding liquid. Both matter.
Underbake slightly. You can always put brownies back in the oven. You can't un-bake them. Err on the side of fudgy.
Use a scale. Seriously. A cup of flour can vary by 30% depending on how you scoop it. Weight doesn't lie.
Storing and Serving
These brownies keep beautifully:
- Room temperature: 3–4 days in an airtight container
- Refrigerated: Up to 1 week (they get even fudgier cold)
- Frozen: Up to 2 months, wrapped tightly
Serve at room temperature for maximum fudginess, or slightly warmed with vanilla ice cream for something truly indulgent.
What to Drink Alongside
The obvious pairing is coffee—these brownies were born to accompany a post-dinner espresso. But consider also:
- Cold milk: Classic for a reason
- Red wine: A fruit-forward Zinfandel complements the chocolate
- Stout beer: Roasty meets roasty
- Port: Decadent, if you're feeling fancy
One Last Warning
We weren't kidding about the title. These brownies set a new standard. Every other brownie you eat afterward will feel like it's missing something—because it is.
Don't say we didn't warn you.
Now go preheat your oven.